Roscoe Stephenson
Guns-n-Rods |
|---|
|
|
|
|

|

|

|

|

|

|
A Few Tricks With Paper Patched Bullets
|
|
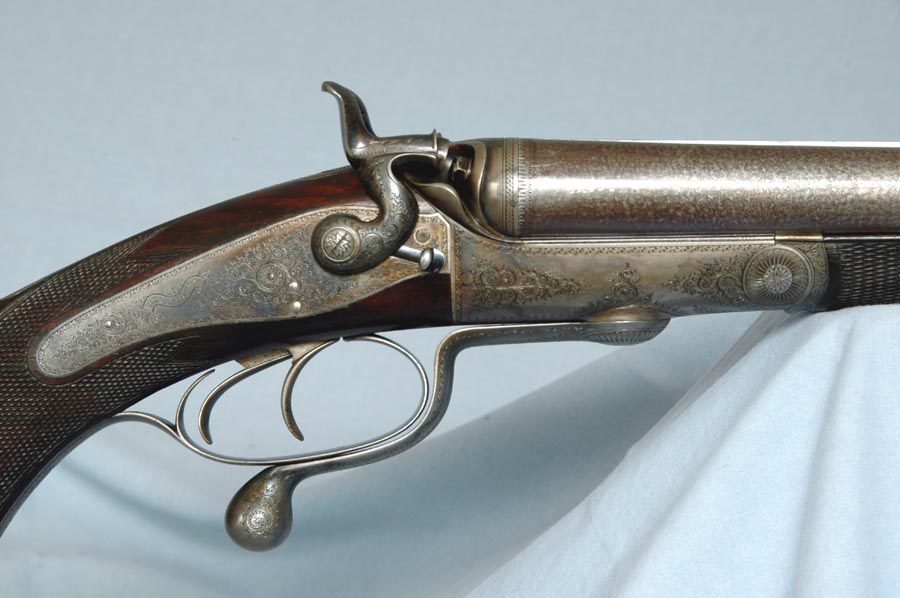
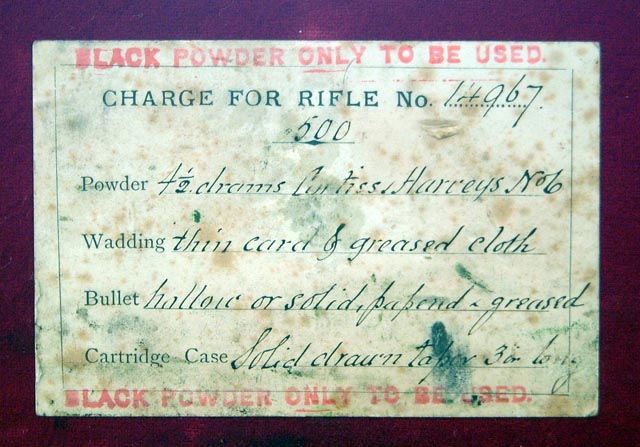
This rifle, made in 1894 and still in excellent original condition, came to me in its oak and leather case with label and charge card. Little did I know that the handwritten words on the charge card would send me down the path to paper patched bullets. But there they were: "Bullet hollow or solid, papered & greased." There I was, a veteran of some 37 years of reloading experience, including many thousands of cast lead bullets, yet I had never loaded a paper patched lead bullet. Actually, the Purdey presented no real need to go that route. Its barrels sport conventional Enfield rifling, and it was obvious to me it would do quite well with "normal" grease groove bullets (which it does). Nevertheless, I took those words as a challenge. This rifle was asking me to feed it bullets wrapped in paper. I made up my mind to do just that.
There's an old adage: If you have a difficult task, give it to a lazy man, he will find an easier way to do it. Well, I'm that man. While doing research my mind was working out ways to streamline the process. One point stood out. Matthews and others say that patches are made by using a sheet metal template in the shape of the patch. The loader cuts around the edge of the template to make patches one at a time. Fiddlesticks! I came up with a much better idea of how to make patches in quantity, and I will now share that with you. I also had an idea of printing a dotted line on the patch to use as a guide while wrapping. Here's how I do it. Let me pause just a minute and explain the scope of this article. I have no desire to make it a comprehensive dissertation on paper patched bullets. Go to Paul Matthews for that. There are many issues; in fact, most issues left unaddressed here. You will have to look to other sources for that information. My main thrust is to pass along some ideas I use to streamline the process. Primarily this has to do with mass production of patches. So let's get started. First you have make a correct patch. You probably know the patch is a parallelogram of paper. It makes two wraps around the bullet. You can get some basic dimensions by taking measurements of your bullet and using some simple math. First, how long should the patch be? Everybody knows that the circumference of a circle is calculated as pi times the diameter. Therefore, the length of a patch for a .50 caliber should be approximately 3.14 x .5" x 2 = 3.14". But it will take a piece of paper longer than 3.14" to make the patch because of the slanted angle of the parallelogram. More on that later. If the long side of my patch is approximately 3.14", what will be the width of the patch? With your calipers you can measure your bullet from just above the beginning of the ogive to the base. To that distance add about 1/2 a caliber and you will have a good approximation of the width of your patch. Now draw your parallelogram on a blank piece of paper. Start with a horizontal line the length of your patch, as calculated above. Using a protractor draw parallel lines intersecting each end at 45 degrees. Now draw a line parallel to your first line at the distance you calculated to be the width of your patch. Cut the patch and give it a try. You may have to make several trial patches to get your dimensions finalized through trial and error. Once you get this right you'll know the dimensions of the patch you need. Then you can automate the process.
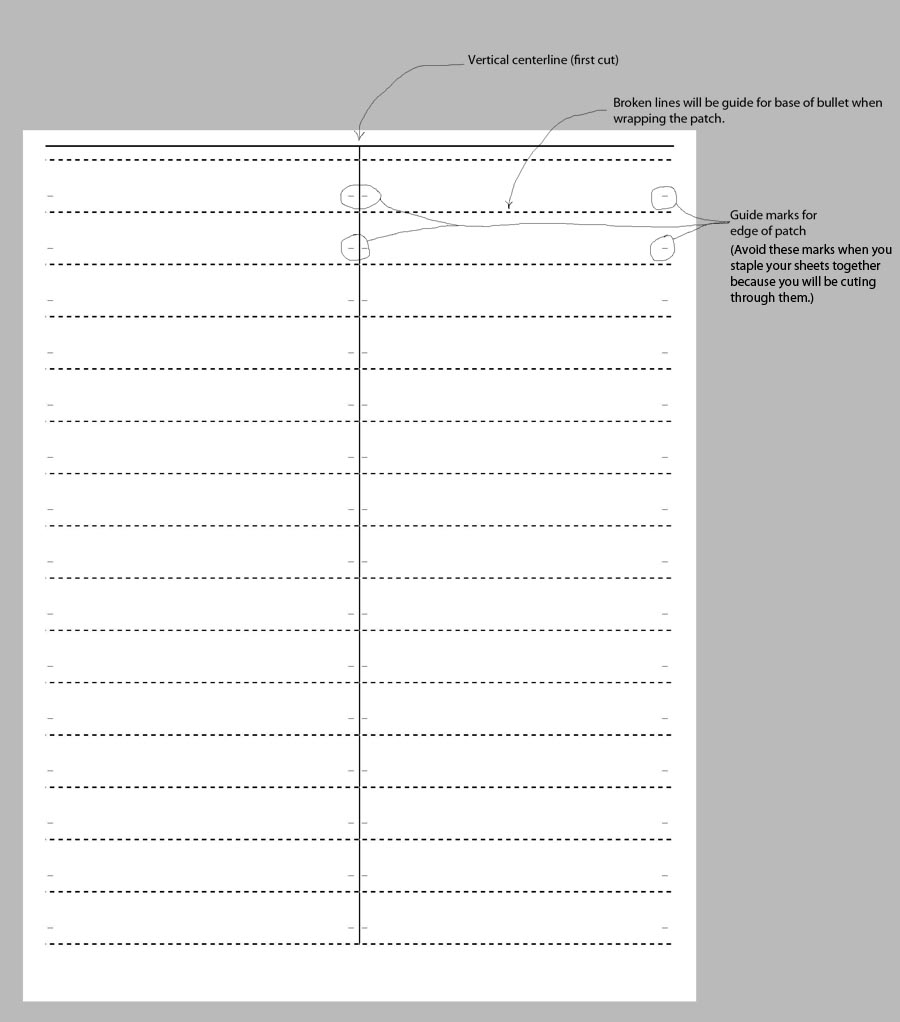
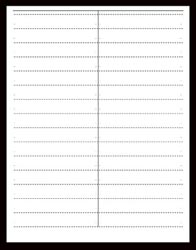
Here's where a computer and laser printer enter the scene. I figured I could lay out a grid on sheets of patching paper and use the lines to guide the cuts. I did it using Microsoft Excel. To the right is a link to the file, and below is an explanation of my marks on the sheet. Click on the image to the right to download the template if you would like to try using it. You can change all dimensions by changing the row heights, etc. But I'm not here to teach MS Excel. You'll have to go elsewhere for that. Let me explain the markings. I'll be cutting the sheet into strips the width of my patch. As you read this, refer to the explanatory image below. I begin by cutting the sheet top to bottom along the vertical centerline using a pair of scissors, because my paper cutter won't accommodate an 11" sheet. The little dashes are my cut guide marks for the edges of the patch, not the more prominent broken lines. By cutting on the guide dash marks I get a rectangular strip of paper whose length is 4.25", or half the width of the sheet. The strip has a broken line through the length of it. But really, I'm getting ahead of myself, because I don't cut these sheets individually; I cut them in multiples of ten. Bear with me. It's easier to do the task than it is to verbally explain the task.
|
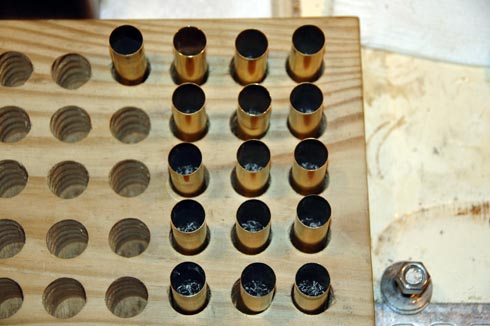
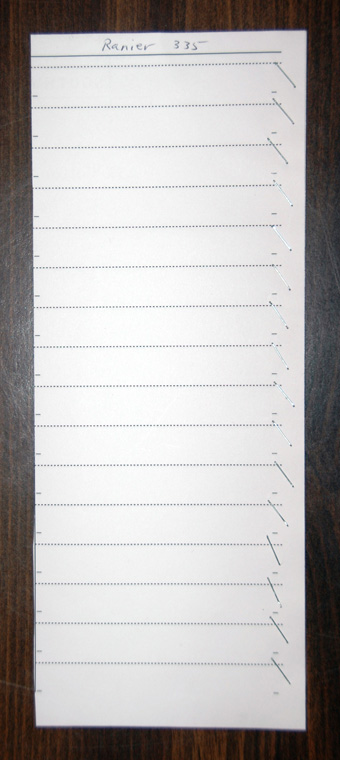
When the stapling is done I cut the pages from top to bottom along the centerline. To the right is a photo of the result of this cut. This picture also illustrates the pattern for stapling. Notice that for .50 caliber patches the patch width is such that the staples must be placed on an angle to avoid my cut guide marks. From now on, all cutting is done with a paper cutter. I have a rather small one, and it does the job well.
|
|
Now I put the stapled sheets on the paper cutter with the straight edge against the guide and what used to be the center of the paper toward me. I cut each strip along the cut guide dashes. This is easy to do. The dashes along the former centerline of the page are right at the edge now and can easily be aligned with the lower blade of the paper cutter.
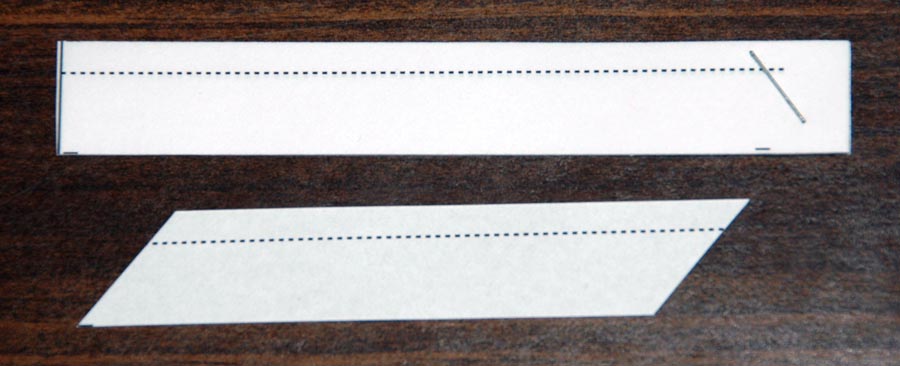
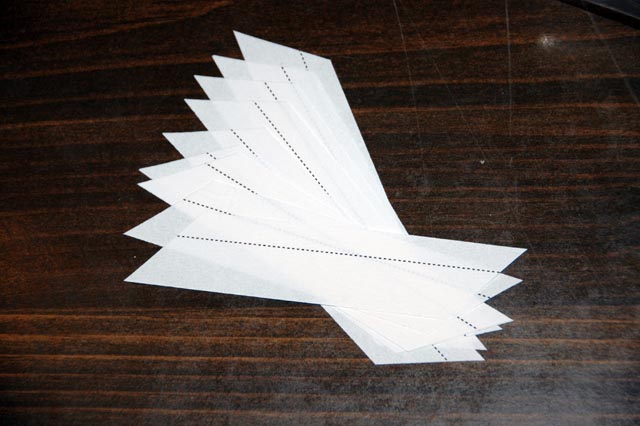
This cutting process yields a bunch of strips, each having ten rough patches stapled together. Below, an assembly of rough strips is pictured above a finished patch..
|
|
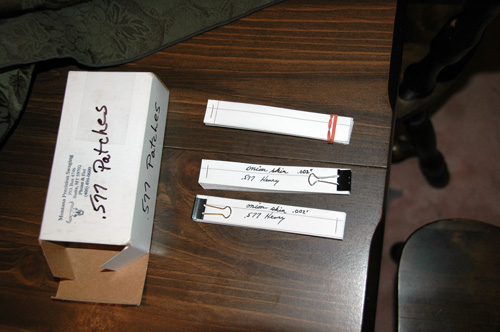
Loading For the .577 BPENow let's switch rifles. I decided to write this article one day when I set out to load a few rounds for my Alexander Henry .577 BPE. Everything from this point on pertains to the .577, but the same techniques apply.
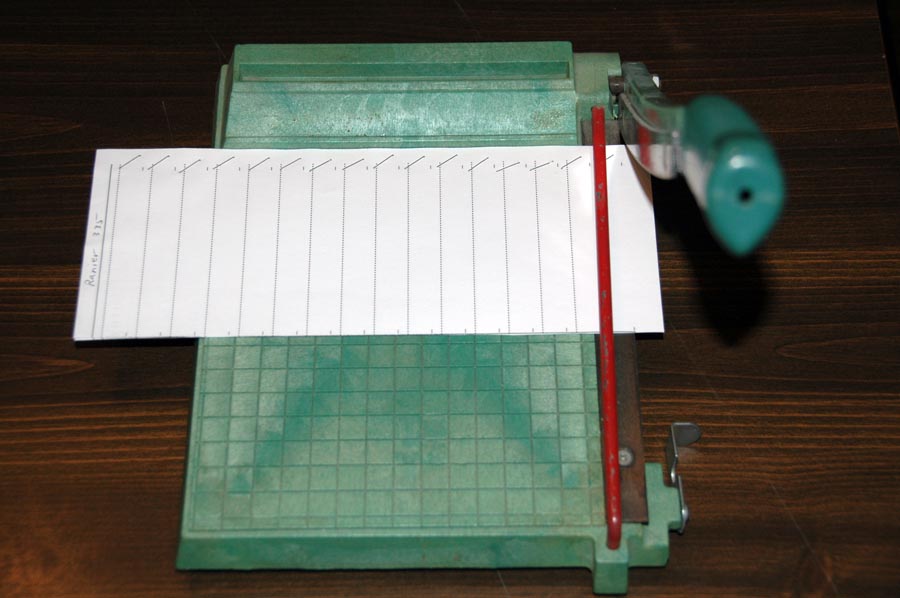
My template for the .577 BPE is similar to the template for the .500, but the longer patches occasioned by the larger caliber require that the layout be landscape rather than portrait. You can click on the image to the right to download my template if you want.
|
|
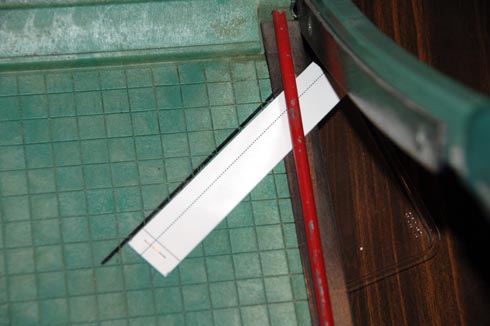
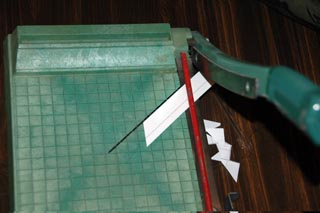
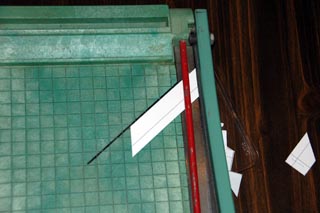
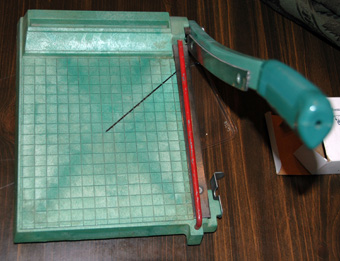
Now let's finish some patches. Notice I scribed a guide line on the table of my paper cutter at approximately 45 degrees to the cut. I place one stapled assembly of strips on the paper cutter and carefully align it with a guide line. I'll cut the loose (non-stapled) end first. Notice that the stapled end is on the table of the cutter. At this point the length is not critical. I make my cut just inside the top corner of the strips.
|
|
Photo to the left - I place the assembly of strips on the cutter. The non-stapled end will be cut just behind the upper corner. To the right - my first end cut is made.
|
|
Now I turn my strips around to cut off the stapled ends. The staple keeps everything lined up perfectly.
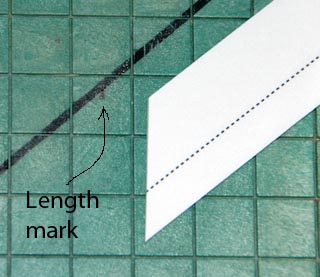
At this point the length is critical. But correct length is easy to control. When you have perfected your prototype patch as first mentioned, just lay it on your paper cutter and make a mark to establish the length of cut.
|
|
|
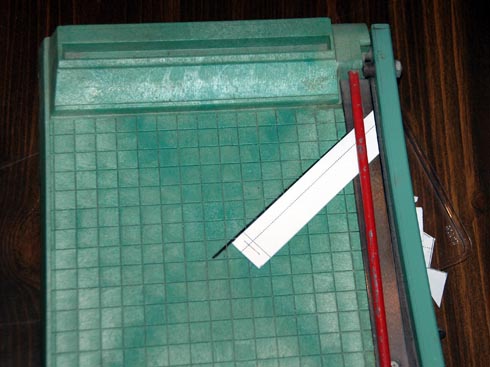
Above left you can see a mark on the cutter guide line where the corner of the patch goes for the correct cut length. Lay the assembly against the guide line and indexed with the cut mark. Cut off the stapled ends, and presto, you have ten patches.
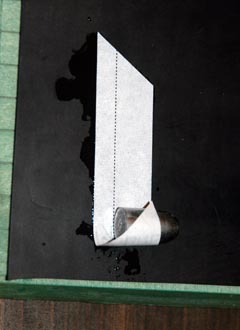
Once you have chopped out enough patches it's time to wrap them on the bullets. You'll need a shallow vessel to hold water for soaking the patches. You'll also need something on which to roll the bullet and patches. I like a sheet of rubber. This can be a piece of gasket material or a piece of an old inner tube. There's some debate about how wet to get the patches. I like them saturated. I put several patches in my water. When saturated I take one out and lay it on my piece of rubber with the end dangling over. Now you'll understand what the internal broken line on the patch is for. It's my guide line for the base of the bullet. Here's how I lay the bullet on the patch and do my wrap.
|

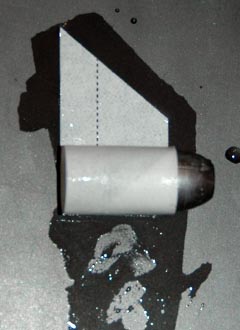
Next you fold the bottom under and set the bullet on a sheet for drying. I use an old cookie sheet my wife was ready to throw away. Set the bullets on their bases, holding the end fold flat. My cookie sheet serves another purpose as you presently will learn.
Once the bullets are wrapped they just need to dry. The wise thing is to wrap 100 or more so that after drying you can put them away for future use. Usually that's what I do, but I must admit there are times when I don't plan ahead. This particular day was one of those times. I want to load right away, but the patches are soaking wet. Don't worry! There's a simple solution.
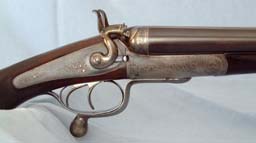
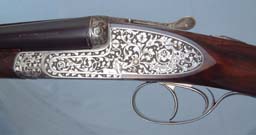
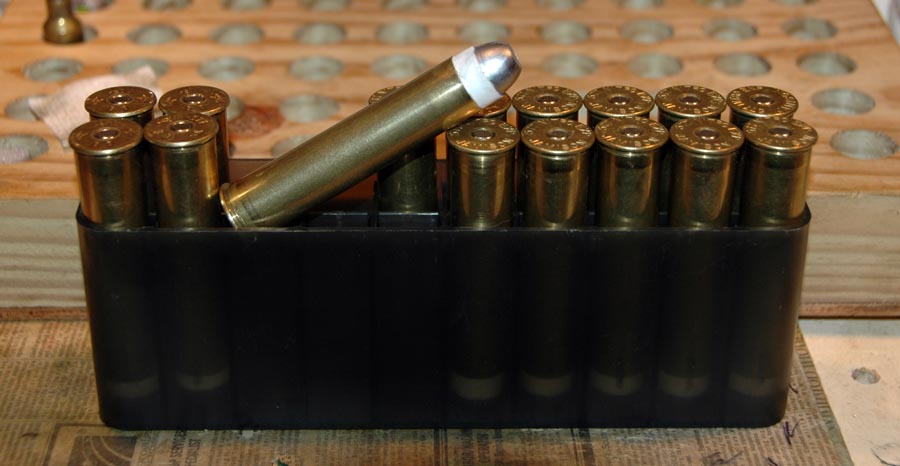
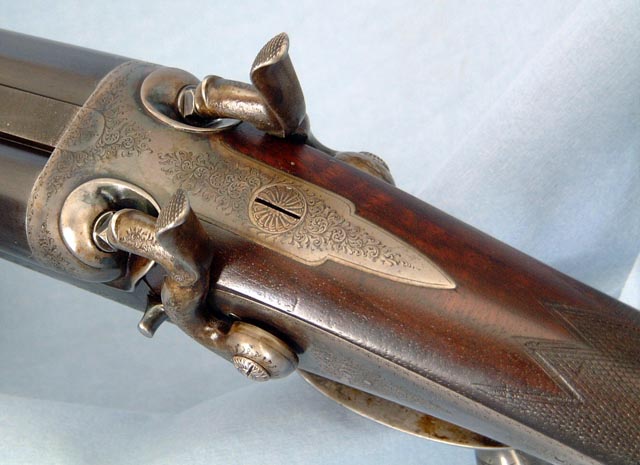
Set your oven on the lowest setting available. Slide the pan of bullets in. Then go to the loading bench. Loading nitro-for-black rounds for my A. Henry .577 BPE is fun. The cartridges are huge. A box of twenty loaded rounds feels like a handful. And the loaded cartridges have a lot of eye appeal. Speaking of which, my Alexander Henry has a lot of eye appeal too. It's a fabulous rifle! Here are a couple of photos.
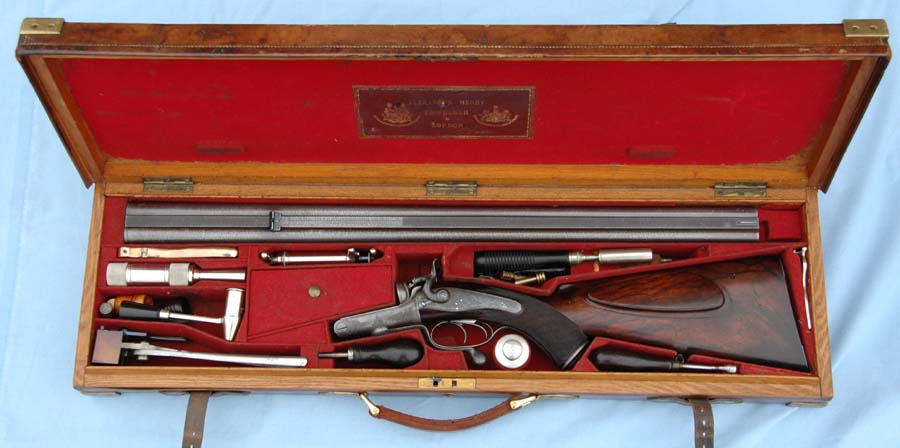
If you would like to see more photos of this rifle, here's a link: Alexander Henry .577 2 3/4" BPE O.K. back to loading now. At the loading bench I've already resized and decapped my cases. These are my "rag-tag" cases. There are 16 total; 4 Bertrams and 12 Jamisons. These are the ones that see the "dirty work" of load development, etc. By the way, please excuse the clutter on my loading bench. I really didn't anticipate this being a photo session. It just turned out that way.
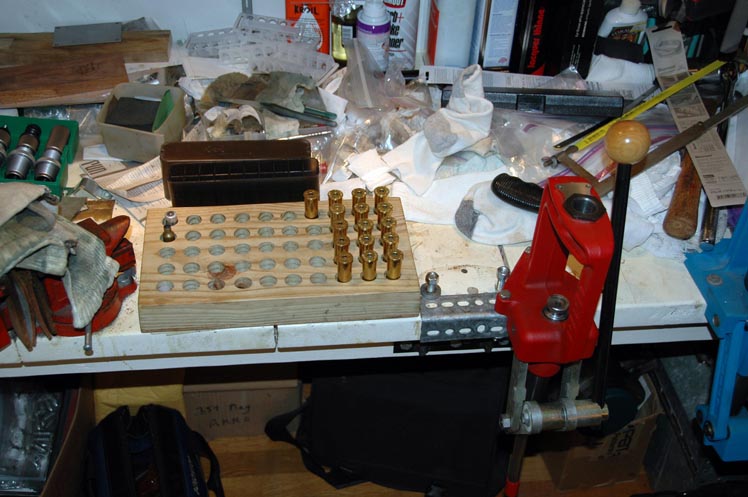
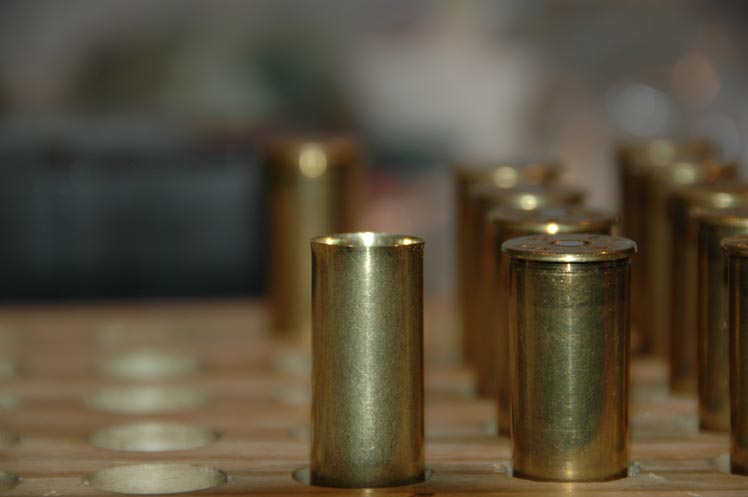
Of course, my next operation is to expand the case mouths and seat primers. I'll be using the Federal 215 magnum primer. When loading paper patched bullets you need to have a significant amount of flare on the case mouth. In the picture below you can see how much flare I applied. This amount should be considered bare minimum. By the time I started seating bullets I was wishing I had applied a little more.
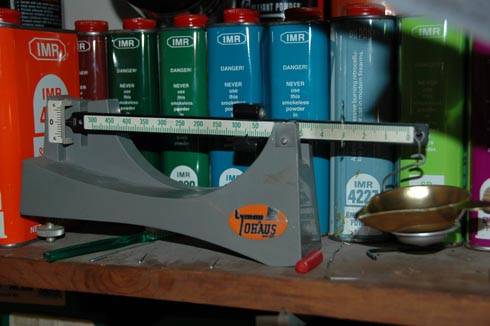
My load is 73.0 grains of IMR4198, a wad made of backer rod, a 560 grain paper patched bullet, and a Fed 215 primer. This bullet is cast from the original mould that came with my rifle and bears the rifle's serial number.
WARNING: Never blindly use somebody else's load. I worked up to this load carefully, using a chronograph to verify results. This load might be dangerous in other rifles. You are responsible for your own safety.You can clearly see there's a lot of empty space left in the case after the powder goes in. Some type of filler must be used. In the past I have used dacron, felt, and foam. Now for the .577 I prefer the use of 5/8" backer rod.
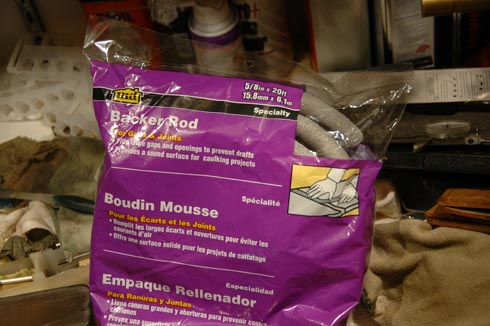

I have found backer rod in sizes 3/8", 1/2", and 5/8". The 1/2" size works perfectly in the .500 BPE, and the 5/8" works in the .577 BPE. You can buy backer rod at your building supply store. It's really cheap!
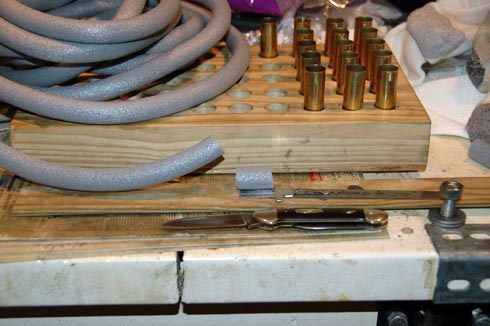
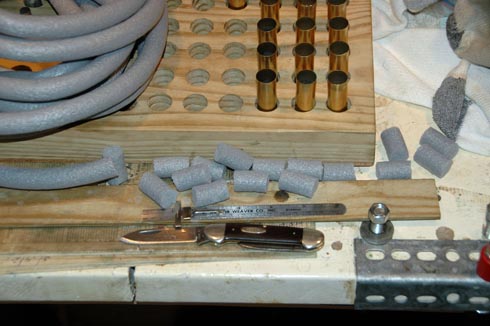
Above you see I just measure out the required length and cut off pieces with my pocket knife. It's quick and easy. I determine the length of my wad by measuring the depth of the powder charge. Something like a AA battery works well with the .577. Slip the battery onto the powder and mark where the case mouth comes on the battery. Measure the length to your mark. You then subtract slightly less than the seating depth of your bullet. That way, when the bullet is seated it presses against the wad and keeps everything tight. Backer rod is made of a closed cell foam. It is surprisingly stiff and resilient, yet incredibly light. The 1" wad I'm using here weighs a scant 1.7 grains. As a closed cell foam backer rod differs from other foam wads. Open cell foam wads are easily compressed and will spring right back into shape after being compressed. Because of that, open cell foam is ideal to use as a wad in a bottle neck case or when the case is somewhat smaller than the diameter of the foam wad. Not so for backer rod. If you squeeze backer rod too harshly you'll break the closed cells. Then the foam collapses. Once it loses its shape in this manner it will not spring back. For this reason the 1/2" backer rod can't be used in a bottle neck case like the .450/400 BPE. What about the .450 3 1/4" BPE? Originally I thought 1/2" backer rod wasn't going to work in that case. More recently I've used it with success. I think my first try was with new .450 brass that was small and hadn't fireformed to the chamber. I'm thankful to a member of NitroExpress.com who had used it successfully and urged me to try again with the .450BPE. We all can learn from the experiences of others. Now back to what I'm loading today. The 5/8" backer rod works fine in a .577 case, though it is a bit tight. To insert the wad I start it in the case mouth and then jently twist it as I push. It's almost like screwing the wad into the case. It will slide in until flush with the case mouth. Then I take a ram, here using a AA battery or the base of a .300 WSM case, and jently seat the wad against the powder charge. You can easily feel when it hits bottom. Leave enough seating depth so you don't compress the wad very much, or the bullet will crush the closed cell foam as mentioned.
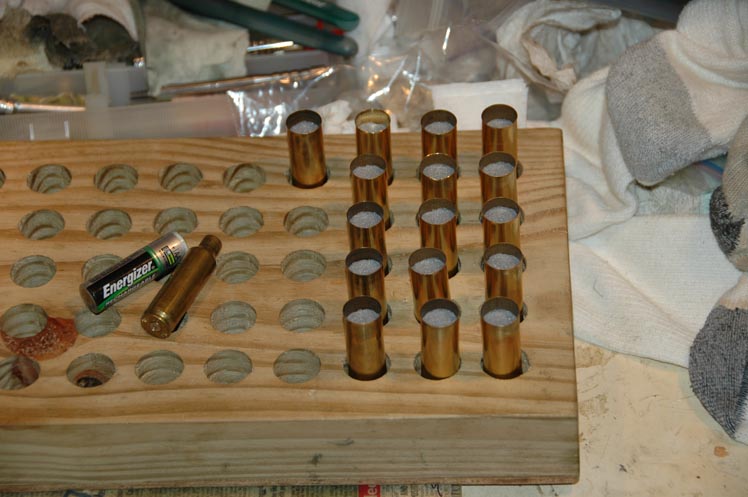
Here you see that the wads are all seated. Now we're ready for the bullets. Oh yeah! The bullets are in the oven.
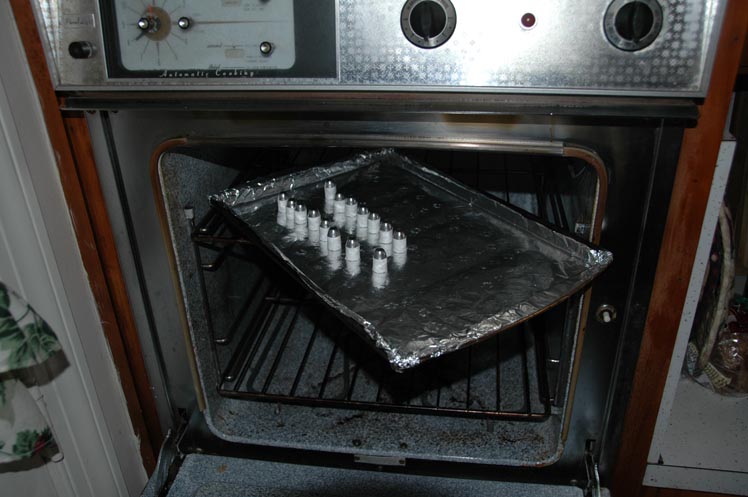
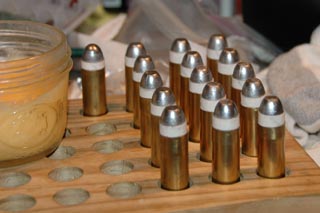
Sure enough, the time it took to expand the necks, seat primers, charge the powder, and cut and seat the wads was just right for drying the patches. Here are the bullets, nice and warm, with dry patches. Don't forget to turn off the oven.
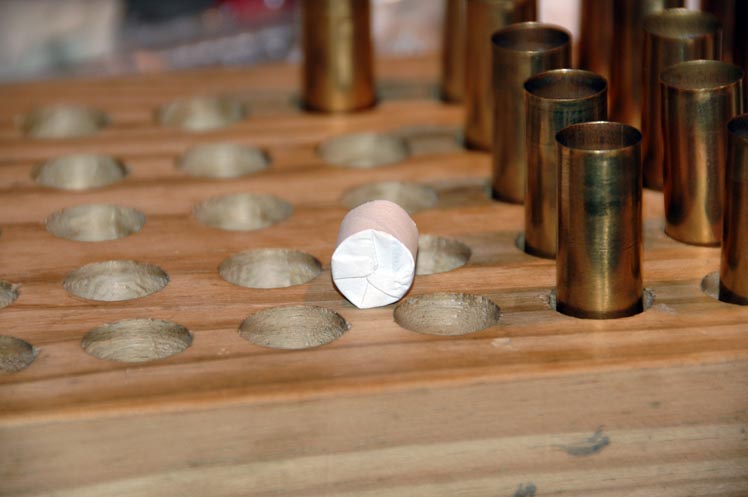
Here's a view of the base of the bullet to show you how I fold the bottom part of the patch. I've heard of people twisting a tail on the patch. To me that sounds like foolishness. Remember, the patch is supposed to fly off as soon as the bullet exits the muzzle. I don't see how twisting a tail on the patch will improve things at all. The next step is to lube the patches. Paul Matthews recommends a lube consisting of 45% (by weight) yellow beeswax and 55% vaseline. That's what I mixed up and have used ever since. An 8 ounce batch will last for years. Apply the lube with your fingers. Just scrape the back of your fingernail across the top of the lube in its jar. You'll get a little ball of lube on top of your nail. Wipe that on the patch and smooth it around with your fingers. Now here's a little trick that's very important. Folding the patch under the base of the bullet leaves a few little folds that stick out from the corner of the bullet. You need to smooth these out so the bullet will start smoothly in the case mouth. After applying lube to the patch I roll the bullet across a smooth wooden board in the direction of the patch wrap. You can use a hard flat object on top also, and that will really iron out the folds. Don't roll opposite the wrap of the patch or you'll loosen the patch.
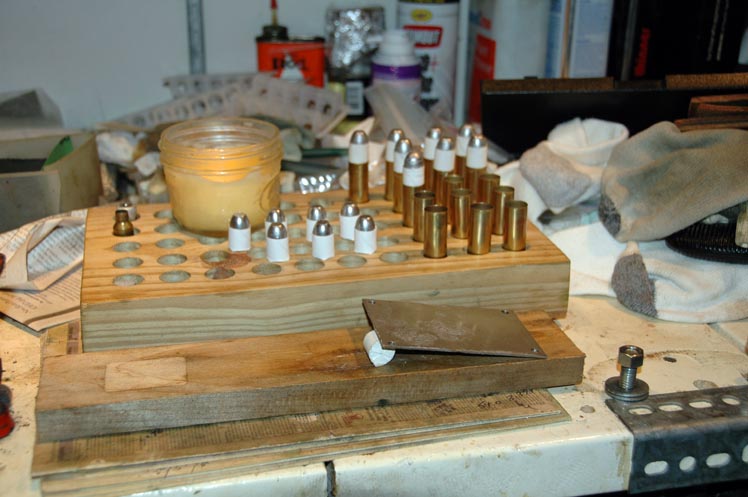
Here you can see I'm rolling the bullet on a smooth board using a small piece of stainless sheetmetal on top. Lube and roll each patch. When you have it lubed and smoothed out, start the bullet into the case mouth by hand. Leave it there to be seated when all the bullets are lubed. Now we'll seat the bullets. People seem amazed that the bullet can be seated without disturbing the patch. Believe me; it can, provided you have sufficiently flared the case mouths and you have smoothed out the little folds at the base. Gently seat each bullet. You'll want to wipe any excess lube from the outside of the case, and you might want to wipe off the nose of the bullet. Be careful not to wipe the lube off the exposed paper.
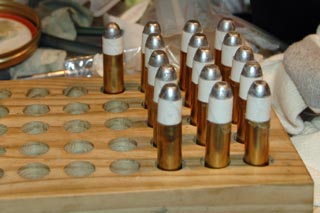
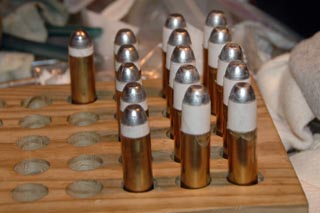
On the left, all the patches are lubed, and the bullets are perched on the case mouths ready to be seated. Middle, some of the bullets are seated. This gives an idea of how deep the bullet is seated in the case. On the right, all bullets are seated. The job is done.
Making and applying paper patches is no mystery at all. It's simple. 125 years ago it was standard practice. It just seems that modern shooters have been spoiled with copper jacketed bullets, so the skill is almost forgotten. Give it a try. You'll find it rewarding. They shoot great, and there's no leading whatsoever.
|
| Copyright 2009-2011. All rights reserved. |
LIFE'S ALL ABOUT GUNS AND RODS
|
|
|
|
|
|
|
 One day in September 2003 I had the good fortune to buy a J. Purdey and Sons double rifle chambered in .500 3" BPE.
 First I did some research. A Google search turned up a couple of websites but nothing comprehensive. I ordered a copy of Paul Matthews' book, The Paper Jacket and read it cover to cover. At that point I felt I could make a start.
 I print ten of these sheets on whatever paper I intend to use for my patches. A laser printer is extremely accurate. When the ten sheets are stacked the lines of each sheet are exactly on top of each other. I stack the ten sheets precisely and then immobilize them with four paper clips. Once this is done I staple the ten sheets together up and down the sides while avoiding my little dashes, the cut guide marks. There will be one staple for each stack of strips that will become patches.

 To the left you see some of the strip assemblies. These can be conveniently stored in quantity after they are chopped out of the assemblage of sheets.